For my last reflection post, I am going to talk about Makerspaces. Makerspaces are used for exploring, creating, and building as well as discovering new ideas, and places to find solutions. Makerspaces promote problem solving and critical thinking while allowing students to have autonomy and choice when setting goals and persevering through them. They allow students to express their ideas! They are primarily rooted in STEM. Students work creatively and collaboratively and explore curiosity and inquiry. Participating in Makerspaces teach technological fluency and digital literacy, and explores meaningful learning for students. Makerspaces are theory based, rooted in the ideas of theorist Papert, who was the founder of Constructivism. Makerspaces are a positive technological development framework that help students grow in social skills, and gross/fine motor skills. They are used for all ages as a project based learning program. The teacher's role in Makerspaces is to be a facilitator and leader in exploration and discovery. Teachers are to set challenges and expectations, but let students ultimately take the lead. Teachers need to support not control! The student's role is to gain content knowledge, and to be immersed in collaborative and meaningful learning.
What have I learned? How will this benefit me as a teacher?
Makerspaces prove that learning can happen outside of the traditional classroom. Students are given responsible roles as learners and given the opportunity to show their creativeness. Using Makerspaces will benefit me as a teacher because I am providing my students with an opportunity to learn and experiment that will help them grow as lifelong learners.
The following pictures show students participating in Makerspaces.
The following video explains what a Makerspace is and how to use it efficiently.
https://youtu.be/NLEJLOB6fDw
Tuesday, April 16, 2019
Genius How
Genius How is a program/movement that allows students to explore their passions, and promotes fostering creativity. It is usually implemented in schools that choose to participate in the program for an hour a week. Students begin making projects for this program by brainstorming ideas of what they want to research. Teachers may add parameters if they choose to do so. Then, students ask questions, and research the answers. Lastly, the students share their work and research with the class. This program promotes the self sufficiency of students and the responsibility of creating something that the students are proud of. Every Genius How project has to include an essential question. This question must promote deep thought and encourage research. The question cannot be easily answered by google, otherwise it defeats the purpose. Students are allowed to research on scholarly websites and use scholarly resources. This introduces them to the idea of digital literacy and also to the idea of determining if a source they use in their project is credible or not. Students will also need access to materials such as those found in a "makerspace" to use for their projects. The best way to showcase student work for this program is to give the students who participate an authentic audience to present to. This can be done through hosting a "Genius Hour Fair" in which students show off their hard work to other students, teachers, and parents.
What have I learned? How will this benefit me as a teacher?
I have learned that involving students in projects and work like this is challenging, but the results are so worth it! It is difficult to teach self-sufficiency, independence, and responsibility. By using Genius Hour, teachers already have a platform in which the students can build off of by experience. Using programs like Genius Hour will benefit me as a teacher because they will allow me to provide my students with an authentic learning experience in a different context than traditional teaching and learning.
The following pictures are examples of Genius Hour projects made by students around the world. These students worked extremely hard on these projects and are perfect examples of what Genius Hour can help your students achieve!
The following video is an introduction to Genius Hour. It gives great tips to introducing Genius Hour in your classroom!
https://youtu.be/PzjIHD7l2Mc
Virtual Fieldtrips
Who has ever heard of the idea of taking a field trip from your computer or device in the classroom? Now that I have, I am amazed at the possibilities that can come with introducing this to your class. Virtual field trips are experiences using technology that allow us to see new places, people, and things that may be difficult to see from the classroom. Types of virtual field trips include presentation images, guided video tours, pre-developed or personalized trips, and interactive or 3D trips. Virtual field trips can also be performed physically using the Google goggles that you can buy.
There are so many great advantages to using virtual field trips in the classroom! They allow students to see outside the classroom without actually going. They also are a great accommodation for students with special needs or limited access to monetary funds. If your class isn't able to go on a physical field trip, why not take them on a virtual one?
You can integrate using virtual field trips across disciplines. For example, if you are teaching a lesson on regions of the world, you could actually immerse the students into each region through virtual field trip technology! Students are able to visualize lessons that are being taught and are engaged all the while!
A good example of virtual field trip technology is Google Expedition. Google Expedition allows teachers to provide guided instruction throughout the field trip process, and comes with sample lesson plans!
What have I learned? How will this benefit me as a teacher?
I have learned that sometimes physically going places with your class isn't possible. This could be for many reasons. Whatever the reason, there is no need to deprive your students of an experience! Using virtual field trips is a great engagement tool for the class, as well as a fun learning experience. I love the idea of skyping experts on topics you are teaching around the world to let them talk and have a discussion with your class. I would have loved that as a kid! This will benefit my future classroom in case a problem with a field trip comes up, and in general, because I anticipate to use this technology often.
The following pictures showcase virtual field trips in action. The first picture is of students using google goggles to participate in a virtual field trip. These goggles allow them to see images, videos, and real time streaming of places around the world. The second picture is of a class having a video chat with another person from a different place in the world!
The following video explains virtual field trips and all the benefits that come with using them in your classroom!
Monday, April 15, 2019
Digital Storytelling
Digital Storytelling engages students in a modern classroom. It offers building of literacy skills such as author's voice, and point of view, deepens knowledge across subjects, provides assessment to showcase learning, encourages collaboration, and allows students to take ownership of their learning.
How to get Started: Teach students HOW to use digital storytelling. Give clear expectations and set guidelines for completion. Teach students HOW to pay attention to details! Teach them to be observant, patient, and always willing to open their minds to something new. We have to TRUST our students! If we never give our students responsibility to complete their own work, and if we never trust that they are competent enough to do it on their own, not only are we depriving them of developmentally appropriate strides in learning, we are demoting their self confidence as learners.
Skills that Digital Storytelling Enhances:
Digital Storytelling helps students reinforce the ability to recall information that is prioritized in the story or passage. It teaches students how to write to their audience, and how to develop their own voice. It promotes creativity and even enhances public speaking ability!
"We Remember Through Stories"
Digital Storytelling SHOULD NOT be used to teach a topic for the first time. It should be used to express what students have already learned and want to showcase. Teachers should provide explicit instruction on what to do AS WELL AS what not to do! The use of rubrics is beneficial. Most of all, have realistic expectations. Set realistic goals and help your students reach them.
What have I learned? How will this benefit me as a teacher?
I have always loved the concept of storytelling. Digital storytelling was new to me as well, but I still enjoy the concept of physically and visually telling a story. Doing this allows students to give content a new meaning, and allows them to apply their content knowledge, not just regurgitate it. Digital Storytelling gives students the why and how of learning! As a teacher, I will allow my students to express their learning in any appropriate way that is best for them. Digital Storytelling will definitely be one of the options.
The following pictures showcase digital storytelling in action. The first picture is of an example of a digital storytelling app, felt board. This app allows students to make felt images of what information or story they are trying to tell. The second picture is an example of another digital storytelling app, puppet pals. On this app, students pose as puppets and record their voice as they tell a story.
The following video showcases digital storytelling app Felt Board and how to use it.
https://youtu.be/cNMzMKSmqok
Student Response Systems
Student Response Systems are apps, programs, or websites that allow allow teachers to obtain real-time feedback while lessons are being taught. They are a great formative assessment! If you are like me, you are wondering: How does it work? If you are using an app like Nearpod, your students are connected to your computer, and you can create whole lessons, polls, questions, and assessments through the app. It looks like a power point, but it is so much more!
Students respond to questions or polls posed through the app, and their answers come up anonymously on the screen, which opens up room for discussion. As the teacher, you can see each answer before it goes up on the screen, which allows you to monitor for inappropriate answers. Using apps like these for student response systems help keep students engaged and also on pace with the entire class. With student response systems, you can also monitor things like attendance. You can also assess prior knowledge. When questions are posed, the app only tells the teacher who missed the question, not the students. This is wonderful, because it doesn't embarrass the students who got the question wrong. These students can actually learn from their mistakes and not be focused on the shame that might come with getting the answer wrong.
Teachers can collect data, analyze it, and implement strategies based on the results. Using student response systems helps students become self regulated learners! It also eliminates manual grading, which allows faster time between assessment and feedback to students, and more time to re-teach topics if needed. There are game features on this app, but they are all educational. Teachers receive grade reports even when the students are playing games! There are so many benefits of using student response systems, as discussed above, but the main ones are: Student response systems increase meaningful communication between students, and between students and teachers. It allows for discussions based on data collected from assessments. It provides anonymity for students who are introverted or embarrassed. Lastly, teachers can adapt their teaching methods immediately. Based on how students are scoring on assessments provided using the student response system, teachers can either move on or go back if they need to.
Student response systems are a great way to assess students without the rigidity of pencil and paper tests. They are also a great way for teachers to accurately collect data, without factoring in the pressure of an exam on a student who is not a good test taker.
What have I learned? How will this benefit me as a teacher?
I never contemplated the use of student response systems. It is an understatement to say that my experience with technology, especially technology used for educational improvement, is limited. However, I am floored with the impressive nature of student response systems! This is such a great way to assess students without all the formalities that made me anxious as a young student. It is amazing how universal these apps are, and how easy they are to use! Not only is it a fantastic formative assessment tool, it is a great way to engage students in learning in ways that aren't textbook! I am definitely going to implement this in my classroom one day, because I believe that it is so important for every learner to have a chance to "show what they know," and that some learners are too shy or nervous (like I was) to physically express my thoughts or write them down on a test paper. Students learn so much more when they are actively engaged, and free of anxieties that might hold them back. I believe that these student response systems can provide what these students need and more.
The following pictures are examples of student response systems being used in the classroom. The first image shows an example of how students can be kept on the same page during a lesson. The second image shows an example of how a teacher would view the lesson on a student response system app.
The following video explains an example of a student response system app, Nearpod.
https://youtu.be/g3GVkM_GVa4
Seesaw
The next great app I am going to talk about is Seesaw. Seesaw is a platform for student engagement. It is basically a learning journal for students! This app provides digital portfolios for students to share their learning with each other, their teacher, and their parents. There are three ways to use it:
1. Students use digital tools to capture their learning.
2. Teachers find and create activities for students to complete.
3. Parents are involved and active in their child's learning experience.
Students are able to "sit in the driver's seat" of their learning through using this app in the classroom. There are so many benefits to using Seesaw! The setup for Seesaw is extremely easy. If your classroom is not at a 1:1 ratio, Seesaw can be used as the center of the classroom. Seesaw is designed for students. The log-on process is quick and easy-all students have to do is scan a QR code. This prevents lost or forgotten passwords and time consumption during class! Seesaw is safe and secure. It is privacy protected-so your student's work and information won't be released.
What have I learned? How will this benefit me as a teacher?
Teachers can approve of what is seen on Seesaw, making it user friendly for all! Teachers can also address problems at school on Seesaw and ask parents to help at home. I have learned that apps like Seesaw aren't just useless apps that teachers use "for show," but apps that store valuable student work and showcase this work for proud parents at home. Using apps like this will definitely benefit me as a teacher, because it gives me a way to compartmentalize my students' work, and it allows my students to be in control of their learning. They will learn responsibility, digital citizenship, and respect. Using this in my classroom one day will be so beneficial to our learning community!
The following pictures are examples of what Seesaw looks like in general, and what it looks like in the classroom. On the left, a student is uploading a project to her digital classroom. On the right, a student is editing their portfolio.
The following video showcases Seesaw's many benefits and uses in the classroom.
https://youtu.be/_dyQaeLva4Y
Green Screens in the Classroom
We all know what green screens are. The sheet type material that movie makers use to make backgrounds become something else. Why, am I writing about green screens? How are they beneficial in the classroom? Crazy, I know. But, when one of my friends did a presentation on green screens in the classroom, the information she provided shocked me.
Using green screens in the classroom provides opportunities for many learning benefits, despite the almost unbelievable relevance of the topic. Students gain a deeper understanding of learning topics, what they have been studying, by using images, sound, and text that communicate their thinking and leraning to an audience. Not only are green screens used for basic storytelling, they are used to place students in an immersive experience in which they are the ones telling the story.
Students are rarely told that they will be using a green screen in class for a project. Why not make this happen more often? Instead of giving a report on the importance of the declaration of independence, why not have the students assume the roles of our founding fathers and act out the actual signing? Incorporate a green screen by adding a background picture from 1776, and it gives the students the opportunity to see what things were like back then. This would be much better than a report or a written test, in my opinion.
Some tips for using green screens:
Decide your background and plan accordingly. It is important to remember the purpose of the project, and not to get lost in the "coolness" of it all. Set up a place where you can have even lighting. Shadows distort the picture, and therefore defeat the purpose. Keep cameras still while shooting. Set the camera up on an even surface so that there will be no shaking.
What have I learned? How will this benefit me as a teacher?
Green screens are actually wonderful tools to allow students to express their learning in a different context. By using green screens, students can tell a story, integrate learning across subjects, and most of all, be engaged in learning through an out-of-text experience. I would love to use this in my classroom one day. It could help me convey a difficult topic through visual methods other than just pictures and video. Green screens could be used for more than what you think!
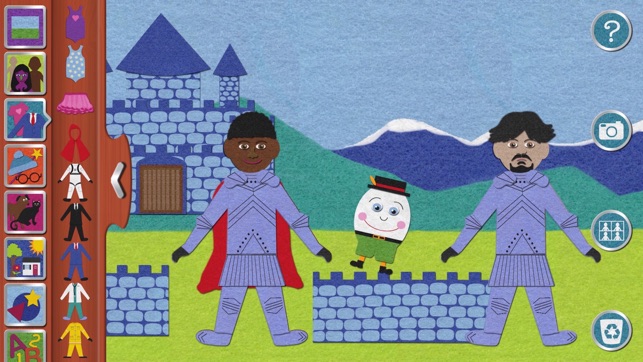
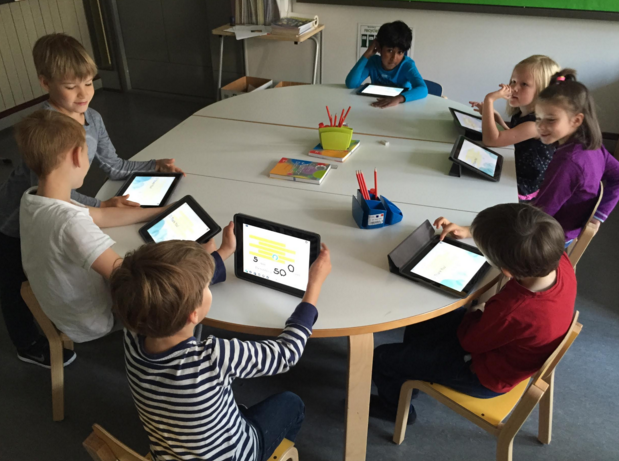
The following pictures are examples of green screens in the classroom. The first picture is an example of students giving a weather report for the class to watch. This is how learning can be integrated across disciplines! The second picture is a good example of immersing students into a historical era by using a green screen. Students can even dress in costume to match the occasion!
The following video is an example of students using green screens in the classroom. Overall, green screens are a fun and engaging way to express learning. The possibilities are endless!
Subscribe to:
Posts (Atom)